Die Software gestaltet sich in mehrere Abschnitte.
1. Die ausführbaren Daten inkl. Installation
Code:
sudo apt install lcdproc lcdproc-extra-drivers cme
cme ist ein graphischer Editor, welcher mit Konfigurationsdateien umgehen kann. Es werden aber nur eine gewisse Anzahl unterstützt, selbst eine total "verhunztes" config-file, kann dieser wieder mit Standartwerden vorbelegen sofern es unterstützt wird. Dabei muss nur eine leere neue Datei angelegt werden, mit dem entsprechenden Namen.
2. Die Konfiguration
Die Adresse des Bausteines bekommt man mittels
Code:
sudo i2cdetect -y 1
     0  1  2  3  4  5  6  7  8  9  a  b  c  d  e  f
00:          -- -- -- -- -- -- -- -- -- -- -- -- --
10: -- -- -- -- -- -- -- -- -- -- -- -- -- -- -- --
20: -- -- -- -- -- -- -- -- -- -- -- -- -- -- -- --
30: -- -- -- -- -- -- -- -- -- -- -- -- -- -- -- --
40: -- -- -- -- -- -- -- -- -- -- -- -- -- -- -- --
50: -- -- -- -- -- -- -- -- -- -- -- -- -- -- -- --
60: -- -- -- -- -- -- -- -- UU -- -- -- -- -- -- --
70: -- -- -- -- -- -- -- --
heraus, hier meldet sich z.B. die RTC auf Adresse 68 Hex. Die Adresse ist natürlich abhängig vom IC, ob ohne oder mit A und von der eigenen Adressvergabe A0-A2. Die entsprechende Adresse ist in LCDd.conf unter Port = 0x.. einzutragen.
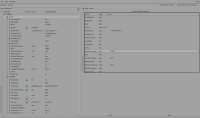
Man kann es wirklich klassisch editieren oder man nutzt cme (siehe Bild im Anhang)
editiert komischerweise /etc/LCDd.conf
Als funktionierende /etc/LCD.conf hat sich folgende Konfiguration ergeben:
Code:
## This file was written by cme command.
## You can run 'cme edit lcdproc' to modify this file.
## You may also modify the content of this file with your favorite editor.


[server]
Driver = hd44780
DriverPath = /usr/lib/arm-linux-gnueabihf/lcdproc/
GoodBye = " "
GoodBye = "    Bye, Bye"
Hello = "     Welcome to"
Hello = "   -------------"
Hello = "    AstroRaspi4 "
Hello = "  ---------------"
NextScreenKey = Right
PrevScreenKey = Left
ReportToSyslog = yes
ToggleRotateKey = Enter

[hd44780]
Backlight = on
CharMap = hd44780_euro
ConnectionType = i2c
DelayBus = true
DelayMult = 4
Device = /dev/i2c-1
ExtendedMode = yes
KeyMatrix_4_1 = Enter
KeyMatrix_4_2 = Up
KeyMatrix_4_3 = Down
KeyMatrix_4_4 = Escape
Keypad = no
OutputPort = no
Port = 0x38
RefreshDisplay = 0
Size = 20x4
Speed = 0

[menu]
DownKey = Down
EnterKey = Enter
MenuKey = Escape
UpKey = Up
3. Die Startsequenz
Als Startscript (lcdproc.sh) habe ich folgenden Inhalt
Code:
#!/bin/sh
/usr/bin/sudo /bin/systemctl start LCDd
/usr/bin/sudo /usr/bin/lcdproc C D M N U
/usr/bin/sudo /usr/bin/lcdgps -l s -u m
Um einen Dienst, Script etc. im Raspi zu starten, gibt es mannigfaltige Lösungen, welche Linux von Haus aus mit bringt. Dies würde den Rahmen hier vollkommen sprengen.
Der einfachste Weg, ist die /etc/rc.local. Einfach vor exit 0 in der Datei einen absoluten Pfad zur lcdproc.sh angeben, wichtig ist, dass vorher die I2C Treiber geladen wurden.
Ich starte es per Autostart Eintrag in der grafischen Oberfläche. Eine Datei unter
~/.config/autostart angelegt, Name:
LCDd.desktop mit dem Inhalt:
Code:
[Desktop Entry]
Name=Autostart-Script
Comment=Kommentar
Type=Application
Exec=/home/pi/lcdproc.sh
Terminal=false
startet das Script
lcdproc.sh, welches im
home-Verzeichnis des Users
pi liegt automatisch, wenn die grafische Oberfläche sich aufbaut. Das Script muss ausführbar sein. Zu diesem Zeitpunkt sind die I2C Treiber sicher geladen.
Nebenbei weiß man, dass der Raspi in der grafischen Oberfläche gestartet ist.
Frohes Basteln